
This post may contain affiliate links. Please read my disclosure policy for more info
Hi friend. I’m so glad you landed on this page where I’ll show you exactly how to start a blog for profit in the easiest way possible.
This post may be a bit long but it will show you exactly how to go about starting your very own blog and get it up and running in under an hour.
Yes, starting a blog is actually super easy, even for non tech people. ANYONE can do it if they really want to.
And best of all, you can start your blog TODAY for as little as under $4 per month.
Now I know there are tons of different courses and guides out there, so it’s easy to become overwhelmed. I will try to make this guide as straightforward and easy to follow along as possible.
And if you’re still feeling overwhelmed, it’s likely because you’re thinking of all the different things you might need to do, or all the things you’re unsure about, or something along those lines.
Trust me, if you get stuck with all those thoughts and you let it hold you back from starting your blog, then you might never get started. So put away all those thoughts, and focus on one thing at a time. You can do this. The first step is simply getting started and setting up your blog. Once that’s done, you can tackle the next problem. Like I said – one thing at a time is the way to go.
Is it still possible to start a blog for profit in 2020?
Okay, so the number one reason most of you probably want to start a blog is to make money from your blog. And I get it, why else would you want to put your time and energy into something without getting anything back?
You SHOULD want to make money from your blog. And I’m happy to tell you that it IS still very much possible. If people tell you that the blogging world is too saturated these days and it’s not possible to make money blogging, they’re truly misinformed.
In fact, I’m ALREADY making money with this blog (mostly via ads and affiliate marketing), and at the time of writing this post, this blog is under 4 months old.
If you’re willing to put in the work, you can definitely make money from your blog. You just have to take action.
And if you take strategic and massive action, you can eventually make a significant income from your blog, and possibly even be able to quit your 9 to 5 job.
Think of it this way.
You’re not just starting a blog, but you’re also starting your very own online business.
And if you truly commit to making this work, set specific income goals for your blog and take massive action towards achieving those goals, you’ll be well on your way to success.
And that’s truly what I want for all of you. I’m over here cheering for you, I know you can do this!
Why start a blog?
So why would you want to make money from your blog, as opposed to a regular 9 to 5 job? There are soooo many benefits to starting a blog and making your own income from it.
- The freedom to set your own schedule and control your own time. You can decide when to work on what, and you don’t have to ask anyone for permission if you need a break or need to run errands during the day.
- Control over your income. You can scale your online business and also your income. There is no limit to your income, it’s not fixed to a monthly salary. The more value you provide and the more you scale, the more you earn.
- Location independence – being able to work from wherever you want.
- The ability to diversify your income and automate it as much as much as possible so you can make it more passive and be able to earn money even while you’re sleeping.
- Extremely low start up cost. You can start and launch your blog for less than $4 per month with Bluehost. And later when you grow and monetize your blog you can easily earn back the small investment made at the start.
- You are free to travel whenever and wherever.
- Your blog can serve as your creative outlet and you can actually create something of value for yourself and others. And you’re able to really help people with their problems.
- More freedom in your life.
Are you convinced yet that starting a blog is worth it?
If so, you’re welcome to follow my guide below to help you get started with the first step of starting and launching your blog.
The services and technologies I mention below is exactly what I used when I started my first blog, and is what I’d recommend for beginners starting their first blogs.
PLEASE NOTE: I’m an affiliate for Bluehost, which means I will earn a commission if you purchase through my link, at no extra cost to you. I only recommend services that I trust and truly believe in.
Here are the steps we will cover:
- Think about your niche and brand
- Get your domain name and sign up for hosting
- Install WordPress and set up your site
- Choose your theme for your blog
- Write your first post and start blogging
- Write your “About” page
- Create your social media accounts
- Launch your first blog!
Step 1 – Your niche & brand
Your niche
Before starting your blog, you’ll want to put some thought into what your blog will be about and what topics your blog will cover. And most importantly, what your end goal is and what you ultimately want to achieve with your blog.
For most of you, I’d guess your end goal would be to make enough money to leave your 9 to 5 job. And if you want to make money with your blog, I’d suggest you go into a niche that is profitable.
If you’re not sure whether the niche you have in mind is profitable, look at other blogs in your niche to see if they’re making money. If someone is making money in that niche, it should also be possible for you to make money in that niche.
That said, here are some niches that I know are profitable and easy enough to monetize:
- Personal finance
- Personal development and self improvement
- Relationships
- Make money online (blogging about blogging)
- Weight loss
- Travel
- Mommy blogger
Of course, there are other niches not on this list that can also make you money. I just listed the most obvious ones.
One thing you want to do when picking your niche is think about how you can put your own spin on it and bring your own uniqueness to it.
Of course you can use other blogs for inspiration and ideas, but be sure to show up as yourself. No one likes a copy cat, and people will often notice if you’re not being you. And being YOU is your greatest asset, even if you don’t know it yet.
Your brand
Before you get into the more technical stuff and sign up for hosting, you also need to come up with a blog name that’s fitting for your niche.
Try to come up with a name that’s short and easy to remember and also reflective of your niche, if you can.
Choosing a name can be difficult as you’ll often find that a lot of names you come up with have already been taken. But don’t give up hope. Spend some time playing around with words and synonyms to come up with something you like that’s available.
Remember, the blog name isn’t what’s most important, so don’t spend more than 2-3 days brainstorming. It is possible to change it later by buying a new domain name and re-branding.
You can use the tool below to check if your blog name is available:
Step 2 – Buy your domain name & sign up for hosting
Your domain name is the name of your blog – e.g. mindherway.com – and hosting is where your blog “lives” on the internet so it is available for others to see. You can buy your domain name from one company and host it with a different company, or you can buy your domain and host it with the same company.
The latter option is easier if you’re just getting started, and this is what I’ll be showing you how to do with Bluehost.
Bluehost is what I used to start my very first blog with and is the #1 recommendation out there for beginners. They host over 2 million websites, so you can see that they’re really popular.
If you sign up for hosting with Bluehost, you get a free domain name so you don’t have to buy it separately.
It’s also super cheap to start with them. Their plans start at $3.95 per month, which is really affordable and basically the cost of a Starbucks latte. Remember, this also includes a free domain name so you don’t have to buy that separately.
So for the price of one less latte a month, you can launch your blog and start your own online business. Awesome right?
Okay, so let’s get started with the step by step process for signing up with Bluehost and getting your blog off the ground.
1) First, you’ll want to head over to Bluehost by clicking here.
You’ll be greeted by the following page and will need to click on the green “Get Started” button shown in the screenshot below.

2) Next you’ll need to select the hosting plan you want to sign up for. Since you’re just getting started, I recommend going with the cheapest option – the basic plan. You don’t need anything fancier for now, and you can always upgrade later when you’ve started making money.

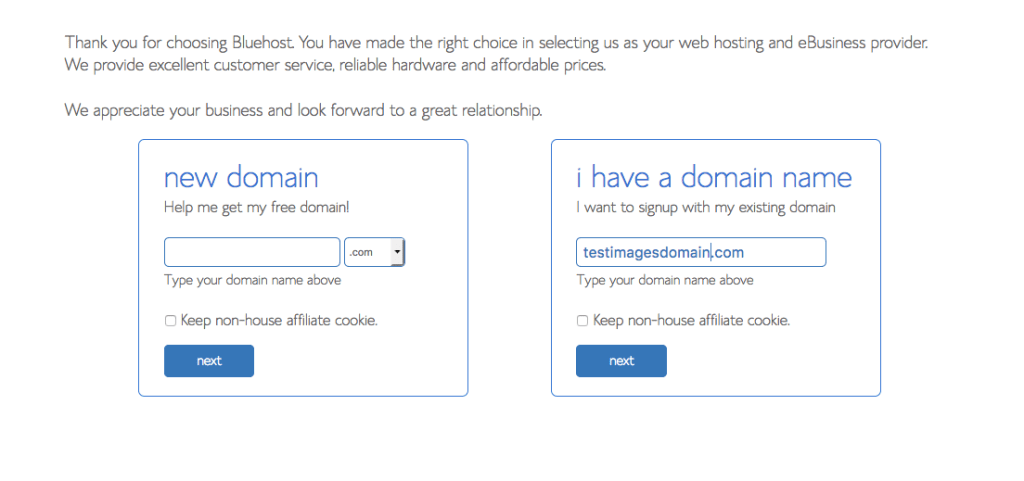
3) Next, you’ll be able to type in your domain name. If you’ve already decided on your name, you can go ahead and type it in. You’re also given the option to skip this step for now if you want to choose your domain name later.
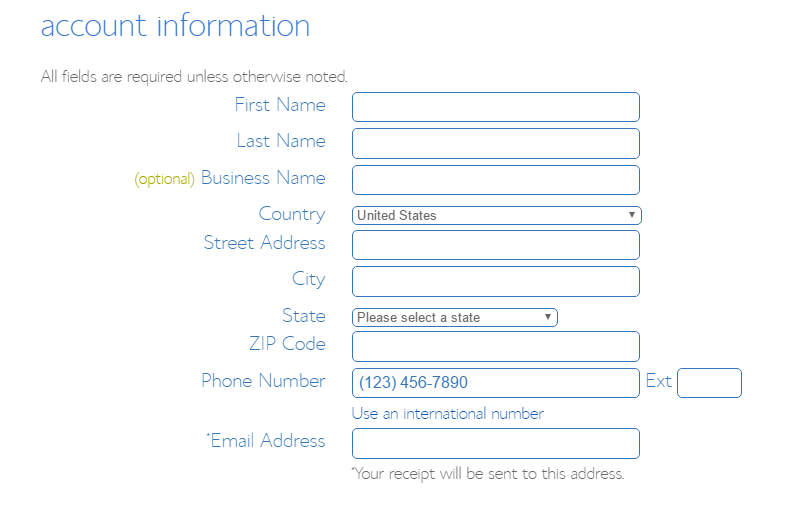
4) Next you’ll be prompted to fill in your account and billing information. Go ahead and fill this in.
You’ll also see a section with details of your package information. Here I would highly recommend that you go with the 36 month plan. That way you get the lowest price for your domain and hosting, and you don’t have to worry about renewing it every year.

It’s important to note that Bluehost will charge you for the 36 months upfront – so that’s $142.20 – but it’s for a whole THREE YEARS of hosting. This is why they’re able to offer to such a good deal for hosting that comes out at under $4 per month. You can choose to sign up for a shorter period, but it will be more expensive.
I would honestly recommend just signing up for the 36 months plan, because Bluehost has a refund policy, so later if you do decide to cancel you will get a refund for the remaining months. And if you really work hard on your blog, you can make back your initial investment rather quickly.
Apart from that, you will also see the option to select additional paid services. Since you’re just starting out, you don’t need to focus on them for now, as you’ll always have the option to add them later when you’ve started growing your blog.
5) Next, you’ll need to fill in your payment information.

Yay, congratulations! You’ve now signed up for hosting and have taken your first step towards becoming a blogger and entrepreneur.
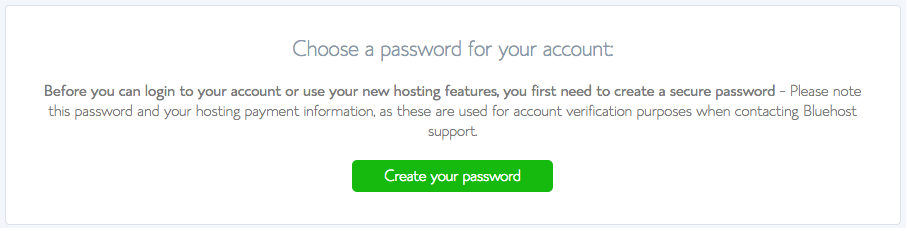
6) You should receive an email from Bluehost welcoming you and confirming your new account. You’ll be asked to create a password for your account – make sure to choose a strong password and keep it in a safe place.

7) After you’ve successfully chosen a password, you should see the success show below screen below. Don’t stress if it doesn’t appear immediately, it can take a minute or so to process.
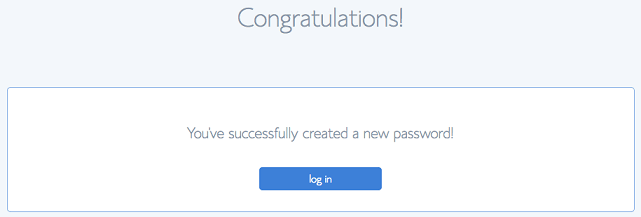
You’ll then be able to login to your account and access the dashboard.
Step 3 – Install WordPress & Set Up
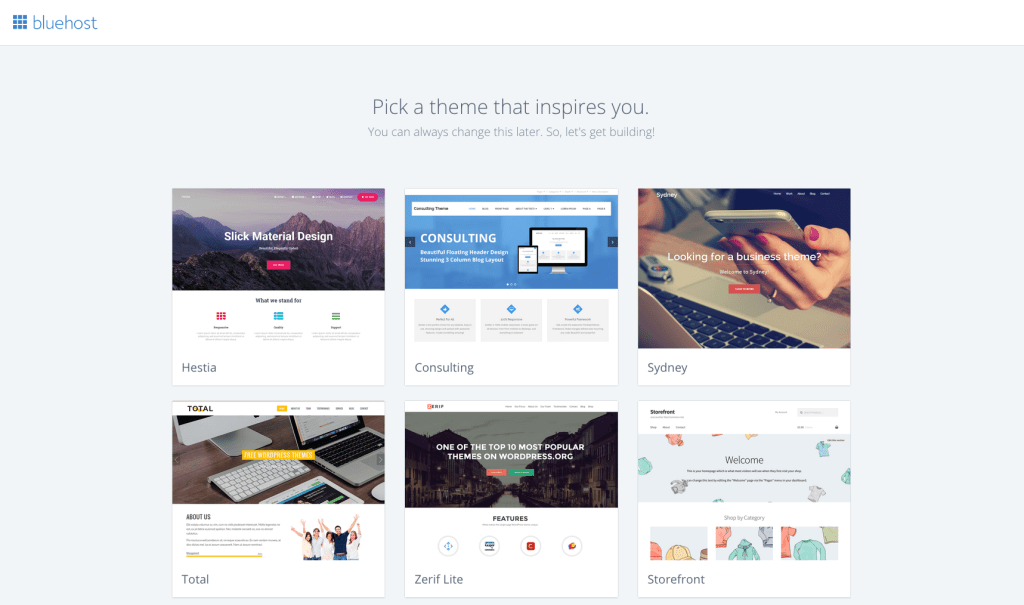
1) If everything went well with the checkout process, Bluehost will automatically install WordPress and you should see the image below asking you to pick a theme.
Just pick any theme you like for now, as you’ll be able to change it later (I’ll show you how).
2) Now you can head straight into WordPress to set up your site. Click on “Start Building” to head on over.

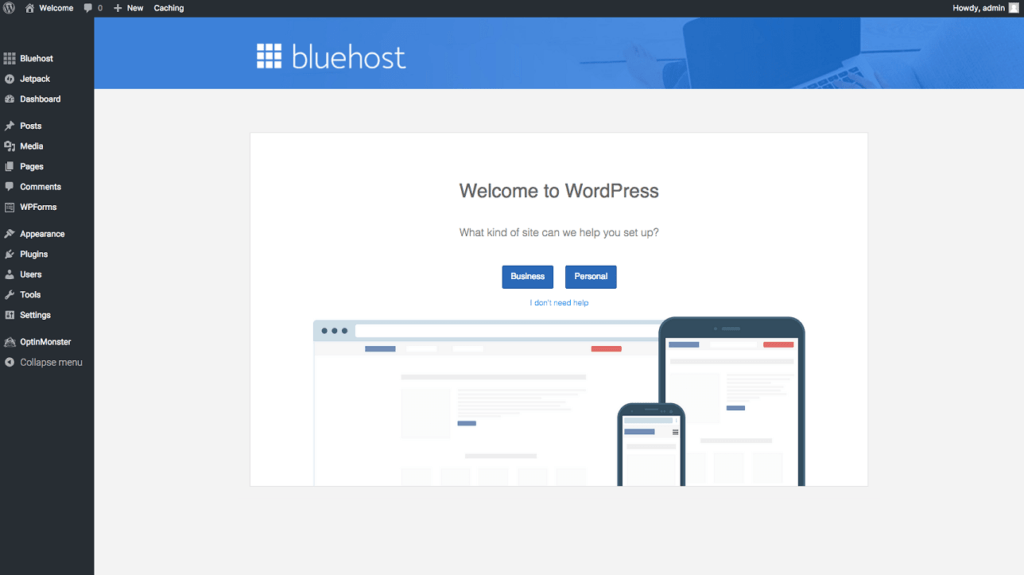
3) WordPress will ask you what kind of site you want to set up, whether it’s for personal or business use. I’m going to assume most of you plan on making some money from your blog, so you can select business.
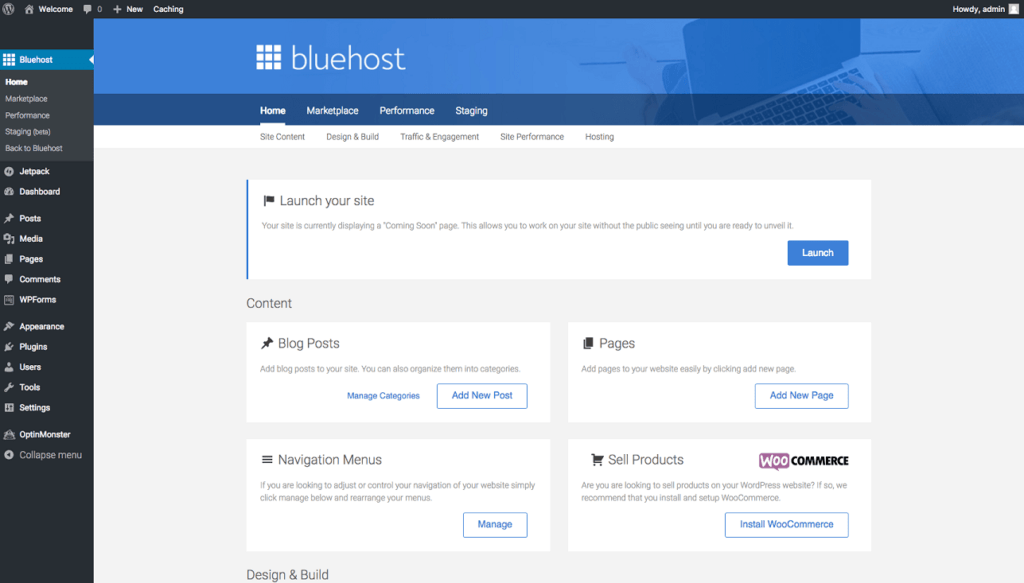
4) Next you’ll be taken to your WordPress dashboard where you’ll see an overview of the Bluehost and WordPress integration. You can manage your WordPress plugins, blog posts, pages and menus from here. But for now, you can click on “Launch” to launch your site.
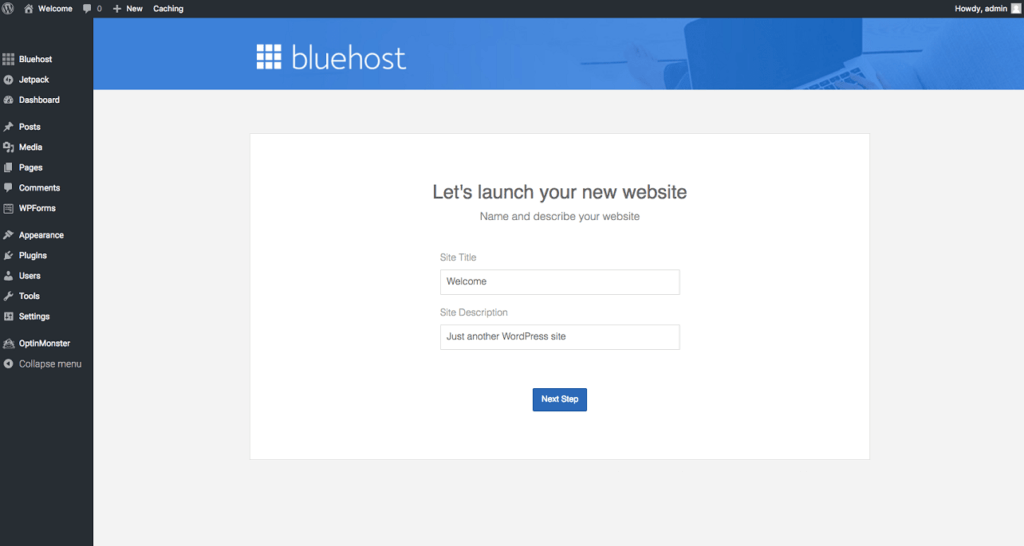
5) Then you’ll be asked to fill in your site title and description. You don’t have to overthink too much at this stage, you can always change or improve your title and description later. Click “Next Step”.
And you’re done! You’ve completed the set up part, and now you’re ready to start blogging!
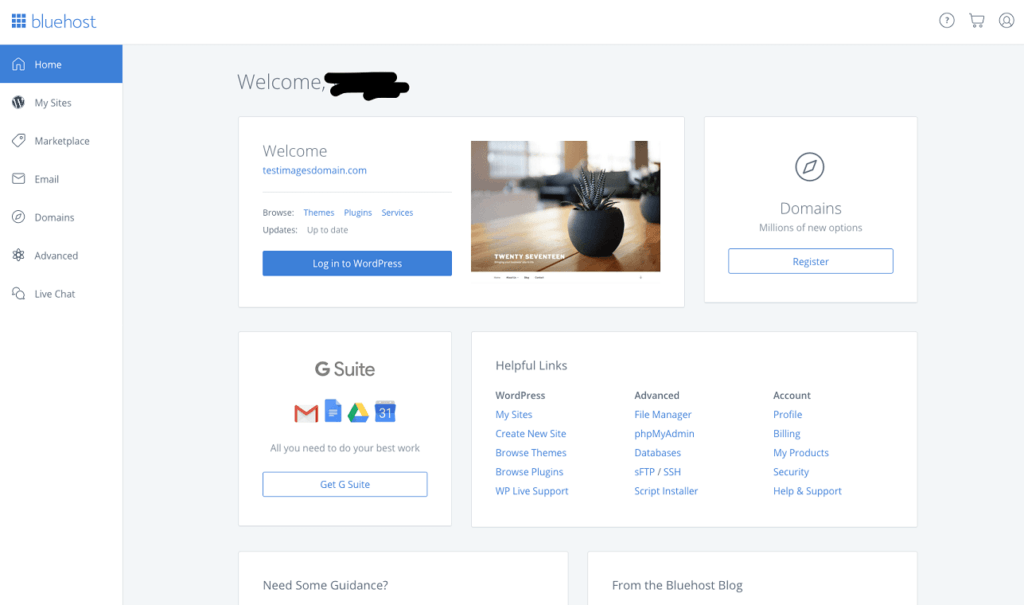
6) If you go back to your Bluehost dashboard, you’ll see it looks something similar to this. You’ll probably spend most of your time in WordPress, but it’s also a good idea to familiarize yourself with the Bluehost dashboard. For example under the “Email” tab is where you’ll be able to set up your email for your domain – e.g. name@yourdomain.com.
Remember if you get stuck or struggle with anything at any time, you can always make use of the live chat support in Bluehost and their tech people will help you out in a jiffy.
Step 4 – Pick a theme
Before we head into the fun and exciting part, grab a celebratory cup of coffee, because – YOU DID IT! You’ve created your first blog! ✨
Now it’s time to start thinking about your blog design and how to make it look pretty and professional.
First up, you’ll want to choose a theme for your blog. There are plenty of free themes out there (including the ones you’ve chosen from before). But in my experience most free themes are somewhat lacking – either in appearance (they don’t all look so pretty), or in functionality.
So if you really want your site to look pretty and professional, I’d recommend you invest in a premium theme.
I currently use the WordPress Astra Pro theme from Brainstorm Force. It’s really easy to use and also fast so it won’t slow down your site. They also have a free theme which you can try out first to see if you like it or not. But purchasing the pro add-on gives you additional customization options so you can really customize your site to get it to look the way you want it to.
I know there’s also a lot of people who also recommended the Divi theme. I haven’t used it personally but from what I’ve seen it looks to be quite user friendly.
It’s really up to you if you want to invest in a premium theme right away or not. I actually started this blog with the free Astra theme to try it out and then I upgraded later on.
You can change your theme from your WordPress dashboard by going to Appearance -> Themes.
Here you can select “Add New” to add a new theme. You can search for the theme “Astra” if you want to start out with it. You can then click “Install” to install the theme and afterwards click “Activate”. Then you can click “Customize” to play around with the colors, fonts and other customization options until you’re happy.
A bit of advice…
One thing I want to note here is, don’t spend weeks and weeks designing your site. Especially when you’re just starting out. And trust me when I say this: You will feel like the site design isn’t done and it doesn’t look good enough or exactly the way you want it to. And it will be easy to use that as an excuse to not start blogging, and keep fiddling and tweaking your site design instead of writing blog posts.
BUT, the way your site looks is not as important as your content. So get your site to look just good enough, and then start focusing on the content. Once you’ve got enough content, you can come back and change your design again. Just don’t get stuck doing this at the beginning.
Step 5 – Start writing blog posts
Well done girl, you did it! Most of the technical stuff is now out of the way, and you can actually start blogging!
To start your first post, from your WordPress dashboard, you go to Posts -> Add New. You’ll be able to add your post title and then the post content.
Try and get about 10 posts added to your blog before you start sending people to your blog. That way, there will be more content for them to look at and they will stay on your blog longer.
Step 6 – Write your “About” page
After you’ve written 10 posts or so, the next thing you want to do is write your “About” page, where you can share a bit about yourself and your blog. This is just so readers can know who you are and connect and get to know you a bit more.
You create a page almost the same way as a blog post, but instead you go to Pages -> Add New instead of Posts. Give your page the name “About” or “About Me” and write the content for the page.
Step 7 – Create your social media accounts
You’ll also want to set up some social media accounts for your blog. The most common ones to set up are:
You don’t have to set up all of them right away, but I do recommend you create Pinterest business account to drive traffic to your blog. I’ll talk a bit more about this later on in this post.
Step 8 – Launch your blog
If you made it to this point, high five girl! I’m so excited for you to be launching your very first blog!
I remember how excited (and nervous) I was when I first launched my blog. It’s such a good feeling!
Let me know how you get on and please drop your new blog URL in the comments below so I can check out your new blog and celebrate with you! ✨
Getting traffic to your brand new blog
The easiest way to get traffic to your blog rather quickly is through Pinterest. And yes, this is STILL true in 2020. In fact, at the time of writing this my blog is under 4 months old and I’m already getting over 500 page views a day from Pinterest to this blog. Here is a screenshot:

All of this traffic comes from Pinterest. Yes, I am working on Google SEO as well, but since it takes a longer time to rank in Google, I’m also focusing a lot on my Pinterest strategy so I can get more eyes on my blog.
So I would definitely recommend that you create a Pinterest business account as soon as you start your blog. You don’t have to immediately start pinning your own content, as you won’t have posts yet, but you can start building up your Pinterest account.
Start by creating 3 to 5 boards with strong keywords for your niche in the title and description. You can then start pinning high ranking pins with those keywords to your boards. Once you have about 5 to 10 of your own blog posts, you can start pinning your own pins to those boards. Make sure to include relevant keywords in your pin title and description to help you rank better.
One thing that has changed recently with Pinterest, is that they now favor fresh pins. This is actually good news for you since it means you can compete with more established bloggers. I think this is also what helped me to grow my Pinterest account quickly in such a short amount of time.
I currently publish 5 to 10 fresh, new pins every day – yes every day, 7 days a week.
Creating new pins every day can seem like a hassle, but once you get into it and have a system in place it gets easier. And it definitely helps to get traffic to your blog much faster.
Monetize your blog
There are various different ways to monetize your blog. The most common, which you’ve probably heard about before, is via affiliate marketing, displaying ads on your site, selling your own products and sponsored content.
There is no right way to monetize your blog, it depends on your end goal and your niche. A lot of blogs use a combination of these monetization strategies to diversify their income streams.
One thing I can recommend though, is that you start building your email list from the get go. There’s no need to leave this for later when you’re already driving tons of traffic. You can start from day one.
You might’ve heard this before – the money is in the list.
ConvertKit is the service I use and I can honestly recommend it for beginners because of how easy it is to use and set up.
You can get up to 1000 subscribers for FREE (no credit card required) with my special link.
There are also some other email services you can use, such as MailChimp and MailerLite, but I feel like ConvertKit is really beginner friendly and easy to use. And since you can now have up 1000 free subscribers, I think it’s worth trying out at least.
Things to keep in mind
- Blogging is a long term game and it takes time to drive traffic and build up domain authority. It is NOT a get rich quick scheme where you will earn thousands of dollars within a month.
- It takes hard work, planning and consistently showing up – you need to put in the work if you want to get something out of it.
- You will encounter obstacles and you will feel demotivated at times – this is not a reason to give up. Take it one step at a time, tackle one problem at a time and move forward. This is how you’ll eventually see success.
- Don’t obsess over perfectionism – take imperfect action. Your site design, your posts – none of it needs to be perfect. It’s better to get something imperfect out there than never getting anything out there due to you feeling it’s not ready or perfect.
- Don’t be afraid to put yourself out there. I get it, it’s scary to show your face to the online world. It seems easier to blog anonymously. But putting yourself out there (your real face, your personality), is how your readers will connect with you and learn to trust you.
- Even if you’re scared – you’ve got this. I know you can do it!
I hope you found this post on how to start a blog for profit useful and that it will help you get started on your blogging journey. Please let me know in the comments section down below if you have any questions or what else I should include in this guide. If you have tips for improving this post or you want me to go into more detail about something, let me know! I really want to hear from you guys, and want to help you as much as possible!
Pin this guide on how to start a blog for profit!
Don’t have the time to start your brand spanking new blog right now? Don’t worry, pin this guide on how to start a blog for profit to your Blogging board on Pinterest. That way you can come back to it later when you have time 🙂

This is very inspiring. I am myself a new blogger and still working very hard to create good content. But after reading this article, gives me more strength to work harder on my own blog. 🙂 thanks for sharing your journey.
So happy to hear you enjoyed the post. You can absolutely make a success of your blog, just remain consistent and don’t give up!